Howdy, Stranger!
It looks like you're new here. If you want to get involved, click one of these buttons!
Categories
Your Dream Floor - Ceramic Tile Installation Guidelines
A meticulously planned ceramic tile floor strategy -- a brilliantly conceived concept, a meticulously developed look and feel, plus the best ceramic tiles -- may perhaps nonetheless be all for nothing in case your tiling installation is not properly carried out. Find out how to perform your tiling the right way with these quick and effortless ceramic tile demolition phoenix guidelines, and see your dream tile floor appear like magic.
1. So as to give a somehow accurate estimate on the number of ceramic floor tiles, the amount of thin set, or cement, grout, along with the tools you can really need to obtain (or rent), measure the length and width from the floor area that you program to tile. Get started measuring by getting the center point of floor location you may be working on. You are able to do that by measuring across the room and marking the center. Do this in opposite path and mark the center, at the same time. The intersection of the two lines is the center on the floor you are going to be tiling more than. Run chalk lines over the intersection lines. These chalk lines will help you later along with your tile positioning.
2. Collect the proper tools you may be needing for the tiling project. You can acquire most of the tools and supplies you are going to will need at you neighborhood hardware retailer, or dwelling center. For gear that could over your spending budget like tile cutters, attempt asking your local home center or tool rental yard if they have the tools you need for rental.
3. If saltillo tile removal phoenix want to perform a clean job of tiling the floor, be sure that the floor you might be installing tiles on is clean. If you are operating on a concrete subfloor, check for cracks and debris. Clean your concrete subfloor initial, and repair the cracks. In the event you see that a few of the cracks are as well big to repair, replace those floor sections with new concrete. Significant cracks (and even smaller sized ones) widen more than time and this can affect your tiles, at the same time. If you are functioning using a plywood subfloor, ensure it's structurally sound and capable of supporting your ceramic tile installation. Your plywood floor must be at least 1 1/8" thick, and supported by an equally sturdy underlayment beneath it. Ceramic tiles are heavy and would require a subfloor which will help their combined weight. Otherwise, they're going to grow to be dislodged or even break. If you are functioning on an existing ceramic tile floor, all you might want to do is use a big flat-bladed chisel in addition to a mallet, and just hammer away. Make sure to preserve oneself protected -- use heavy-duty leather work gloves, security glasses, and long-sleeved perform clothes.
4. To get a clearer visual of how your tile floor would appear like, lay out your ceramic tiles by following the chalk lines you've previously produced. Start in the center and function you way down towards the edges. Commence at the center, exactly where your intersecting lines meet and work your way out. You can go creative at this component in the ceramic tile installation directions and in fact see your preferred look for real.
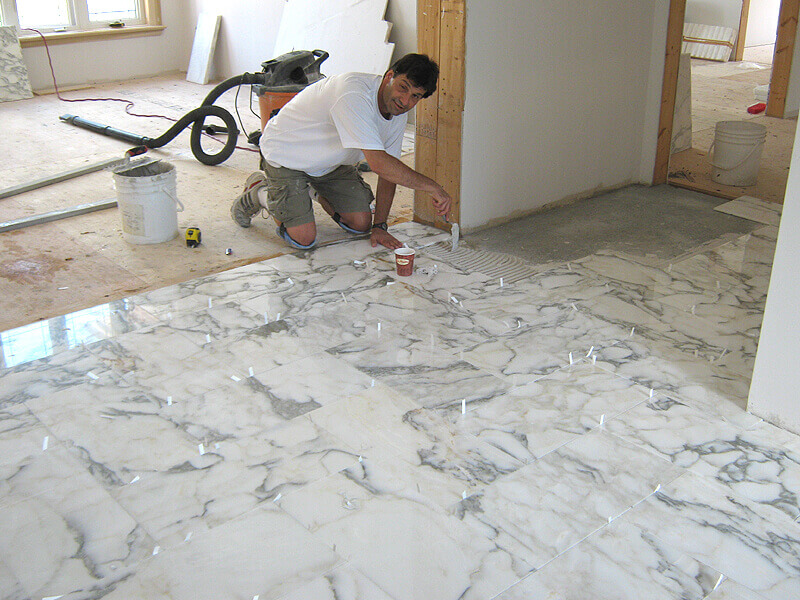
5. Once you have positioned the tiles on the floor in the manner which you like, you could now start tiling. Spot the center tile and bond it for your subfloor utilizing a thin set mortar, or a tile adhesive of the selection. It truly is advised that you just use a notched trowel to apply the mortar to the subfloor, but you might actually make use of the additional common trowel selection that could possibly be suggested by several tile installer phoenix guidelines. To secure the ceramic tile in its place, press down even though twisting it back and forth till the tile no longer is set. If several of the mortar or adhesive oozes out, use your trowel to scrape off the excess.
6. Be sure that you enable the tile adhesives to settle overnight. You may also check your thin set mortar or tile adhesive's ceramic tile installations directions for the bonding's setting or hardening time.
7. On
1. So as to give a somehow accurate estimate on the number of ceramic floor tiles, the amount of thin set, or cement, grout, along with the tools you can really need to obtain (or rent), measure the length and width from the floor area that you program to tile. Get started measuring by getting the center point of floor location you may be working on. You are able to do that by measuring across the room and marking the center. Do this in opposite path and mark the center, at the same time. The intersection of the two lines is the center on the floor you are going to be tiling more than. Run chalk lines over the intersection lines. These chalk lines will help you later along with your tile positioning.
2. Collect the proper tools you may be needing for the tiling project. You can acquire most of the tools and supplies you are going to will need at you neighborhood hardware retailer, or dwelling center. For gear that could over your spending budget like tile cutters, attempt asking your local home center or tool rental yard if they have the tools you need for rental.
3. If saltillo tile removal phoenix want to perform a clean job of tiling the floor, be sure that the floor you might be installing tiles on is clean. If you are operating on a concrete subfloor, check for cracks and debris. Clean your concrete subfloor initial, and repair the cracks. In the event you see that a few of the cracks are as well big to repair, replace those floor sections with new concrete. Significant cracks (and even smaller sized ones) widen more than time and this can affect your tiles, at the same time. If you are functioning using a plywood subfloor, ensure it's structurally sound and capable of supporting your ceramic tile installation. Your plywood floor must be at least 1 1/8" thick, and supported by an equally sturdy underlayment beneath it. Ceramic tiles are heavy and would require a subfloor which will help their combined weight. Otherwise, they're going to grow to be dislodged or even break. If you are functioning on an existing ceramic tile floor, all you might want to do is use a big flat-bladed chisel in addition to a mallet, and just hammer away. Make sure to preserve oneself protected -- use heavy-duty leather work gloves, security glasses, and long-sleeved perform clothes.
4. To get a clearer visual of how your tile floor would appear like, lay out your ceramic tiles by following the chalk lines you've previously produced. Start in the center and function you way down towards the edges. Commence at the center, exactly where your intersecting lines meet and work your way out. You can go creative at this component in the ceramic tile installation directions and in fact see your preferred look for real.
5. Once you have positioned the tiles on the floor in the manner which you like, you could now start tiling. Spot the center tile and bond it for your subfloor utilizing a thin set mortar, or a tile adhesive of the selection. It truly is advised that you just use a notched trowel to apply the mortar to the subfloor, but you might actually make use of the additional common trowel selection that could possibly be suggested by several tile installer phoenix guidelines. To secure the ceramic tile in its place, press down even though twisting it back and forth till the tile no longer is set. If several of the mortar or adhesive oozes out, use your trowel to scrape off the excess.
6. Be sure that you enable the tile adhesives to settle overnight. You may also check your thin set mortar or tile adhesive's ceramic tile installations directions for the bonding's setting or hardening time.
7. On